The Big Questions - How Should I set up my Cockpit?
31 October 2013 | By AngusMcIntoshThe next installment in MoreDirt’s big questions delves into the tricky business of understanding cockpit set up and how it will affect your riding.
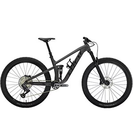
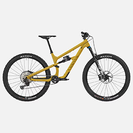
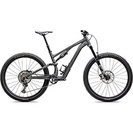
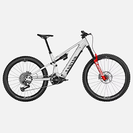
One of the most important but most probably most overlooked part of setting up your bike to be as efficient, fast and comfortable on the trails as possible is the cockpit. Everything from the stem rise/length to the rise and sweep of the bars will make a difference to your riding position and therefore need careful consideration.
Now is as good a time as any to point out that there is no black and white when it comes to personal set up of the cockpit... Look upon the following article as a gentle push in the right direction and not a firm set of instructions to live by.
How much is it going to cost me?
If you’ve already got componentry that your happy with this isn’t going to cost you a penny! Just a couple of minutes with the allen keys getting everything in the right place.
Happy days!
The Stem.
Stem length and rise has a massive bearing on the control and overall feel off the bike. Traditionally we used long stems to move the handlebars forwards to basically make incorrectly fitting Mountain bikes fit correctly with a slightly longer reach. The same can be said for the rise on a stem that will bring the handlebars a little higher and make the bike feel more stable on steeper terrain.

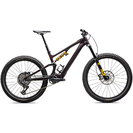
The spacer setup on this Pyga test bike takes things a little to the extreme but moving spacers above or below to adjust things up and down can make a massive difference to your cockpit.
Personally I run a 40mm stem on my downhill bike to make up for the long top tube and almost always something shorter than 60mm on any other trail bikes that I get the privilege to ride. I find that if I go any longer I lose directness in the steering and end up stretching for the bars but I guess the important part to recognise here is that your stem length and rise can be used to adjust the overall length of reach required.

Changing stem length either longer or shorter is going to adjust the overall reach from seat to handlebars as shown by the arrows.
Handlebars.
There’s a bit more to consider here than the stem as we not only have rise and width to consider, to a slightly lesser extent changing the sweep of the bar a few degrees will move you riding position back and therefore change where your weight is positioned. It’s important to remember that weight distribution would then have an impact on suspension set up and even tyre pressures.
When choosing rise of the handlebars you obviously needs to take into account the overall height of everything on the front end… including the stem itself spacers underneath and stack height of the headset. If you have a high front end already the last thing you going to need is a set of 3 inch rise bars that will have you choppering all the way with no control into the nearest tree.

The sweep on the bars is shown by the lines. A greater sweep is basically a more curved bar. A greater sweep will push your body position slightly further back. Less sweep will move you forward.
I feel like I’m repeating myself here a little but it’s all about finding what is comfortable for you personally.
Slightly higher rise bars can give you a little more control on steep terrain but obviously these principles can be taken a little too literally.
Finally you also have to consider width of the bar… Fashion has dictated over the last few years that we have slowly gone wider and wider with our handlebars but I think many would agree we have finally stopped growing year on year and have found the point which is good for most guys in most applications. For most people it will be somewhere from 800 down to 740mm on the downhill bike and 760 to 700mm wide on a trail bike.
The width of your handlebars should be in proportion to the width of your shoulders. If you’re a 6 foot 5 man mountain you would obviously be at the longer end of the scale compared to someone who is 5 foot nothing and has no where near the same kind of arm span!

Rise on the bars is shown by the white lines... Once again its very much a personal preference.
There’s no golden formula here for bar width (Not that I’m aware of anyway!) I speak from experience here however… It’s a whole load easier to cut down your bars to the correct width then be sticking metal back on the ends to make them wider… Measure twice and cut once!
Once you are happy with your bars and stem the next thing to think about is grips.
The Grips
This one is once again a personal preference thing but there are a few things to consider.
Comfort is obviously a major factor but thickness of the grip appears to have a pretty sizable difference on arm pump. Push on grips are on the whole thinner than their lock on counterparts so can work better for riders with smaller hands! Push on grips are however not without their short falls when compared to lock on’s, there’s nothing worse than getting moisture between the grip and handlebar and ending up with grips that are twisting as you ride.

The ODI Ruffian lock ons are a popular choice for all round comfort!
Choosing a grip that works for you may take a bit of experimentation as everyone has different tastes.
If your looking for some new rubber for your hands to spruce up your ride or try something completely different we have a wide range of offerings from 2 of our personal favourites ODI and Renthal over on the MoreDirt shop! You can find them here…
Lever Positioning and angle
The final thing that needs consideration is how you position your levers
The biggest mistake people make is setting up there levers so that they care more about getting their bars to look neat and tidy than actually have a performance that will give the best performance.
How far your lever is away from the grip will determine how much leverage you are going to be getting and therefore how much power you will be getting from your brakes. Personal preference is also something that you should take into account at this point such as which finger or fingers you are braking with!

Getting lever spacing from the bar is correct to maximise the most of the leverage you can generate from the lever!
You shouldn’t ever really have the brake clamp butted right up against the grip as almost certainly you aren’t going to be getting as much leverage and therefore power on the lever blade as you could be if you put it in the correct place!
Once you have your levers in the right place it’s time to consider the angle.

Getting lever blade reach is important so that you pads have gained some bite on the disk before you crush your other fingers.
The angle of the brake lever is also something that needs careful consideration. The main deciding factor is how you spend most of your time on the bike. If you spend the majority of your “active riding time” standing up and attacking on the downhill bike or sitting and pedaling on a trail bike your levers will have be in a different position!
I say “active riding time” because if you think about it, on a trail bike you may spend the majority of the time sat down blasting around your local loop but how often do you brake when you’re in that position sitting down climbing? Brakes are for descending so your set up wants to be weighted towards when you are going to need the most from your brakes and that’s when you’re stood up giving it hell!

Lever angle should be adjusted so its parallel with your arms to reduce fatigue on wrists. You shouldn't ever be at either extreme so the middle image is probably in about the right area!
In an ideal world you want your arms to be parallel with your hands when you are in your comfy position. This way it’s going to be putting less strain on your hands and wrist’s reducing fatigue and increasing performance.
Now go and experiment!
Experimenting to get your cockpit to a place where you are completely happy might not happen overnight but these simple changes are well worth spending 5 minutes in the garage with the allen keys over...
I’ll end in much the same way that a previous “Big Questions” article on Suspension set up finished.
Being comfortable with your bike set up makes you a faster and all together better rider. That doesn’t mean your bike will immediately feel the most comfortable it ever has, but you should take confidence knowing that your set up is getting somewhere close to text book and therefore getting you the best performance.